Settings - Role Configurations
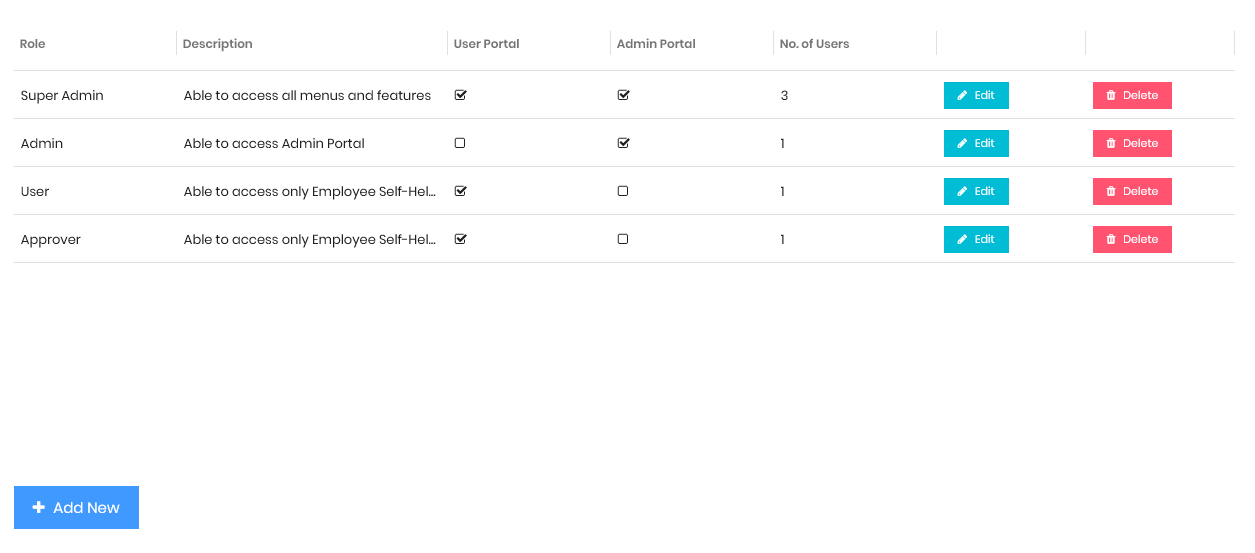
Role Configurations
|
To Edit:
Step 1: Click [Edit] on the selected row to begin. Step 2: Amend the record. Click [Save] to update the record. Click [Cancel] to cancel the update. To Delete: Step 1: Click [Delete] on the selected row. Step 2: You will be prompted a confirmation message. To proceed, click [Delete]. Click [Cancel] if you do not want to proceed. |
- Administrator is able to create many roles for different types of user access.
- In each roles, you will assign the user accounts that belong to the role. You are also able to define the features & data that the role is able to access.
- Each user account can only be assigned to a role.
 |
To Create a New Role:
Step 1: Click [Add New] to create a new role. The following dialog will appear, as seen below. Step 2: Enter the details in the boxes provided. All fields are mandatory. Select "User" portal if this role is allowed to access Employee Self Help Portal. Select "Admin" portal if this role is allowed to access Admin Portal. You may select both "User" & "Admin" portal. |
|
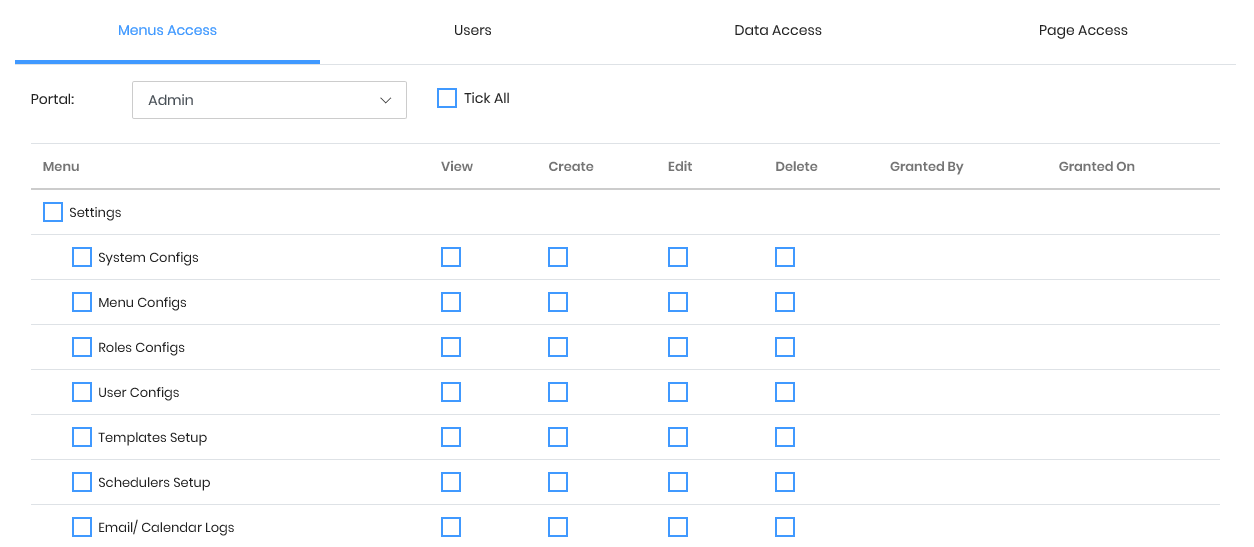
Step 3: In [Menu Access] tab, select the menu(s) you want for this role to access. You can restrict read/ write access by giving permission to [View], [Create], [Edit] & [Delete].
|
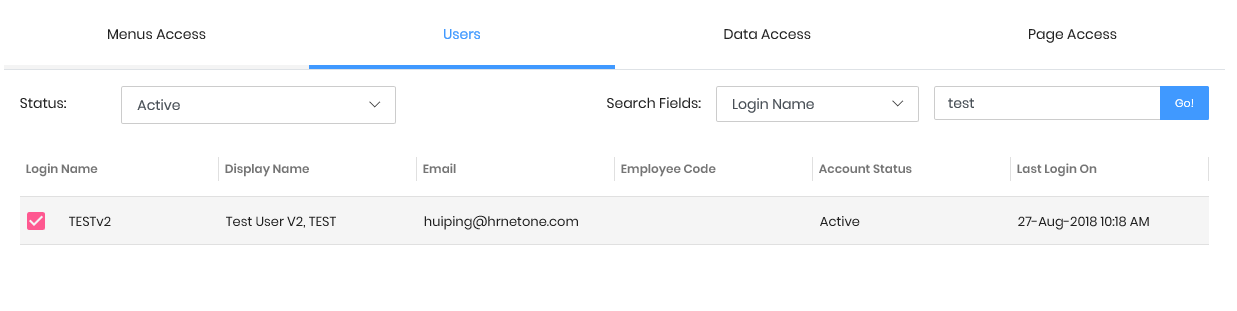 | Step 4: In [User] tab, select the user(s) for this role. You can make use of the search fields to quickly and easily find the user accounts. |
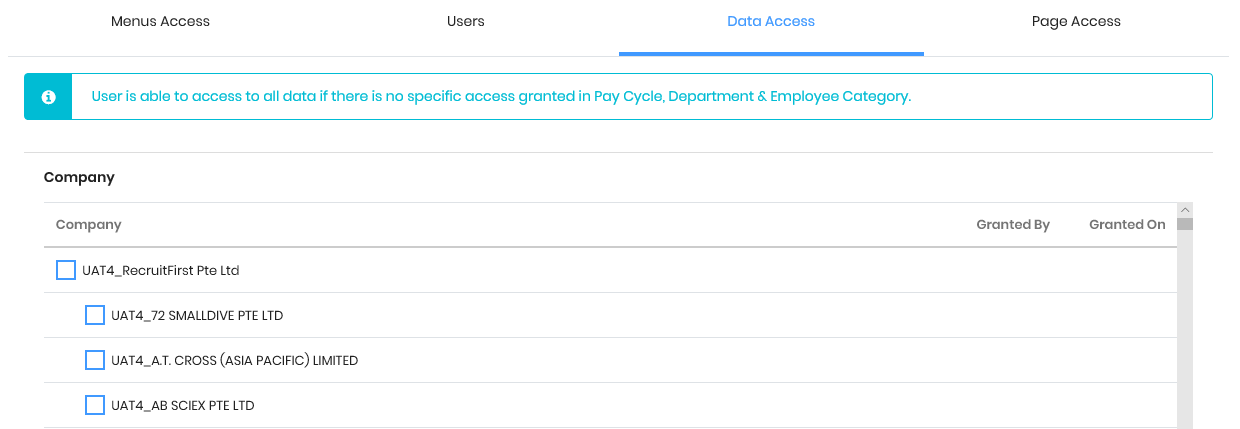 |
(For Administrative Role Only)
Step 5: In [Data Access] tab, select the companies which are required for his role to access. You may also restrict the access of data by giving permission to Pay Cycle, Department or even Employee Category. If there is no specific access granted, user will be able to access all data. |
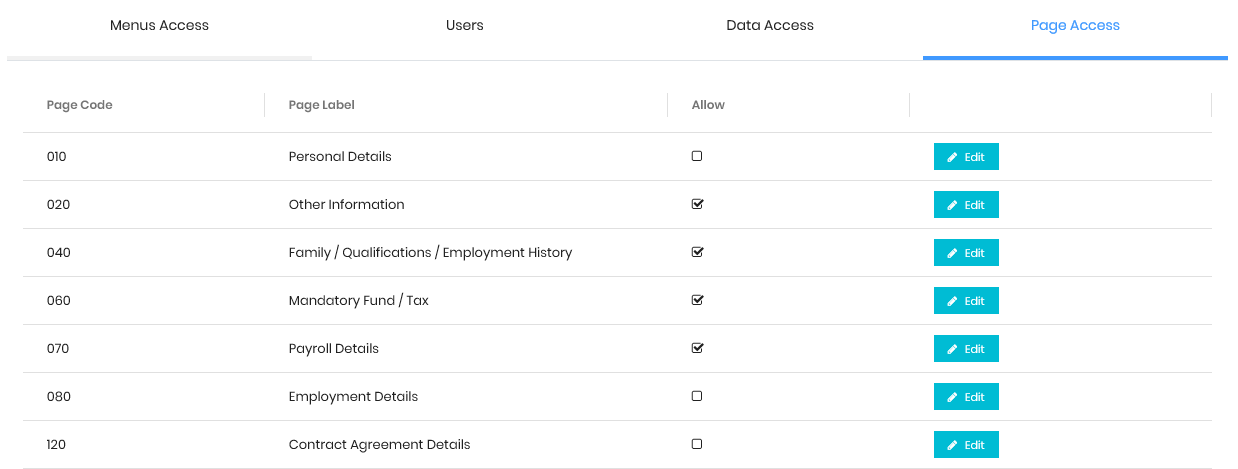 |
Step 6: Employee profile is categorized into the above page labels. In [Employee Page Access] tab, select the page(s) which are required for this role to access.
Step 7: Click [Create & Close] to save the record and exit. Use [Create & Add More] if you need to add more than 1 role.
|