Timesheet - Wizard
|
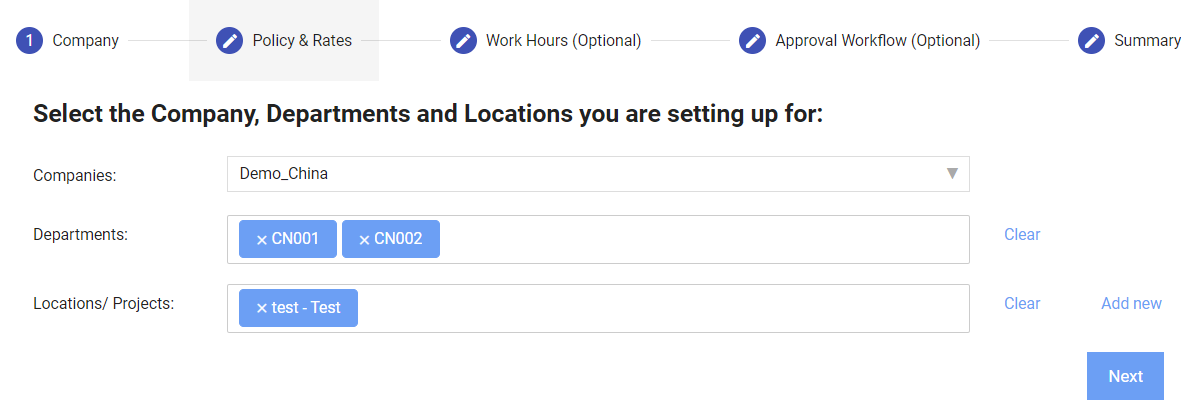
Step 1: Select the Company, Departments and Locations that you are setting up for. Once done, click [Next] and you will be redirected to the next page, as shown in Image 2. |
|
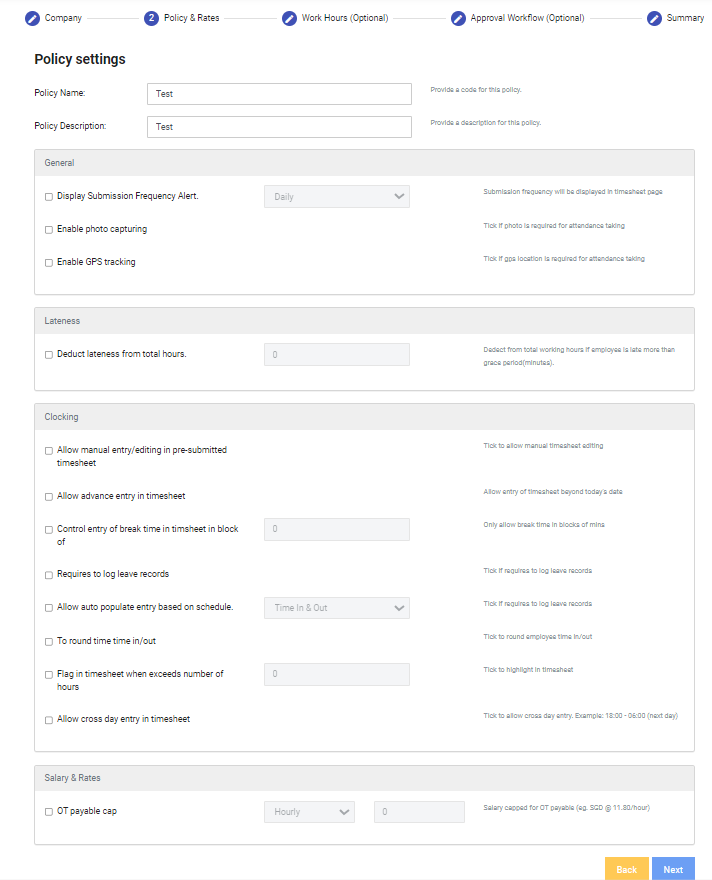
Step 2: Fill up the Policy Name and Policy Description, followed by the General, Lateness, Clocking and Salary & Rates Settings. Once done, click [Next] and you will be redirected to the next page, as shown in Image 3. To return to the previous page and make changes, click [Back]. |

|
Step 3: Select the Work Hour Settings that you would like to Select, once done, click [Next] to save your changes. You will then be redirected to the next page as shown in Image 4. To return to the previous page and make changes, click [Back]. For each setting that you have selected to add, a dropdown menu will appear. Click [Add New] and fill up the required details. To save your changes and add more, click [+ Create & Add More]. To save your changes and exit, click [Create & Close]. Else, click [Cancel]. This section is optional. If you would like to skip this section, click [Next] without selecting any of the options. |
|
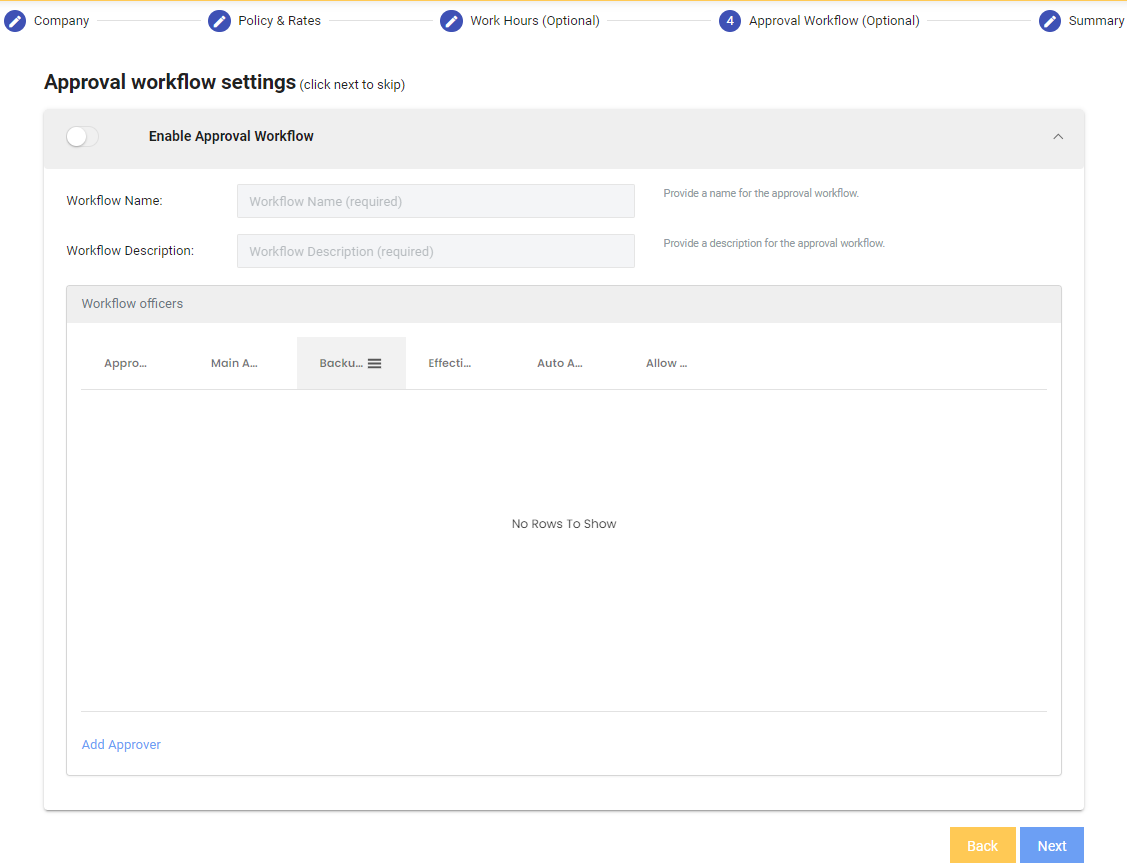
Step 4: To enable approval workflow, select the checkbox in the Enable Approval Workflow option. A dropdown menu will appear, as shown in Image 4. Step 5: Click [Add Approver] and fill up the required details. To save your changes and add more, click [+ Create & Add More]. To save your changes and exit, click [Create & Close]. Else, click [Cancel]. Step 6: Once done, click [Next] to save your changes. You will then be redirected to the next page as shown in Image 4. To return to the previous page and make changes, click [Back]. This section is optional. If you would like to skip this section, click [Next] without selecting any of the options. |
|
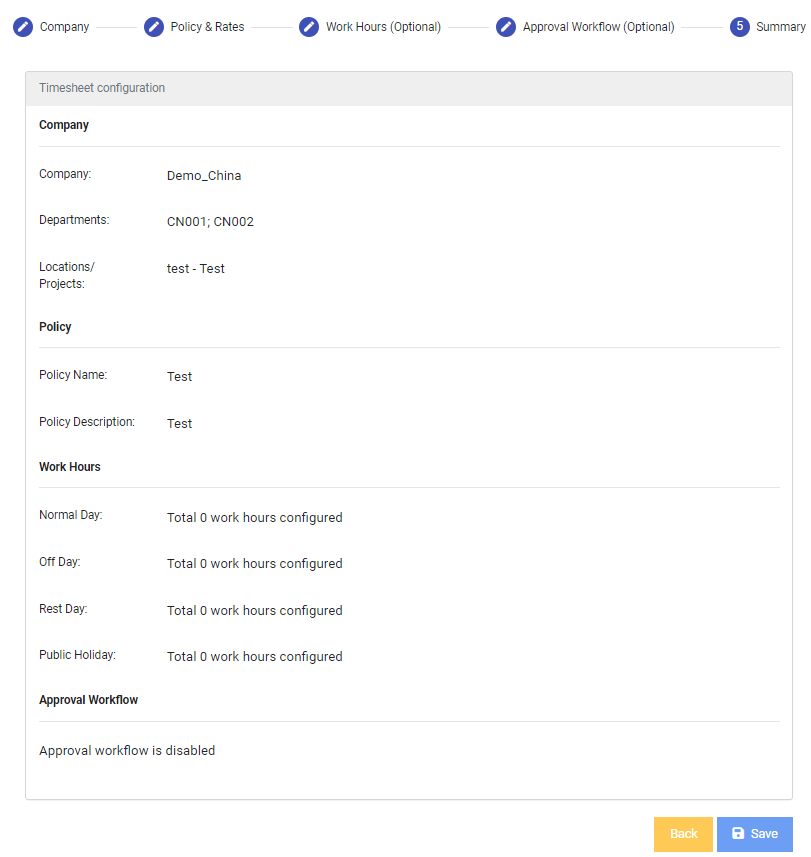
Step 7: Lastly, you will be redirected to the Summary Page. Check the configurations of the Timesheet that you have just setup. Once done, click [Next] to save your changes. To return to the previous page and make changes, click [Back]. |