Setup - Billing Client Settings
Core Configurations
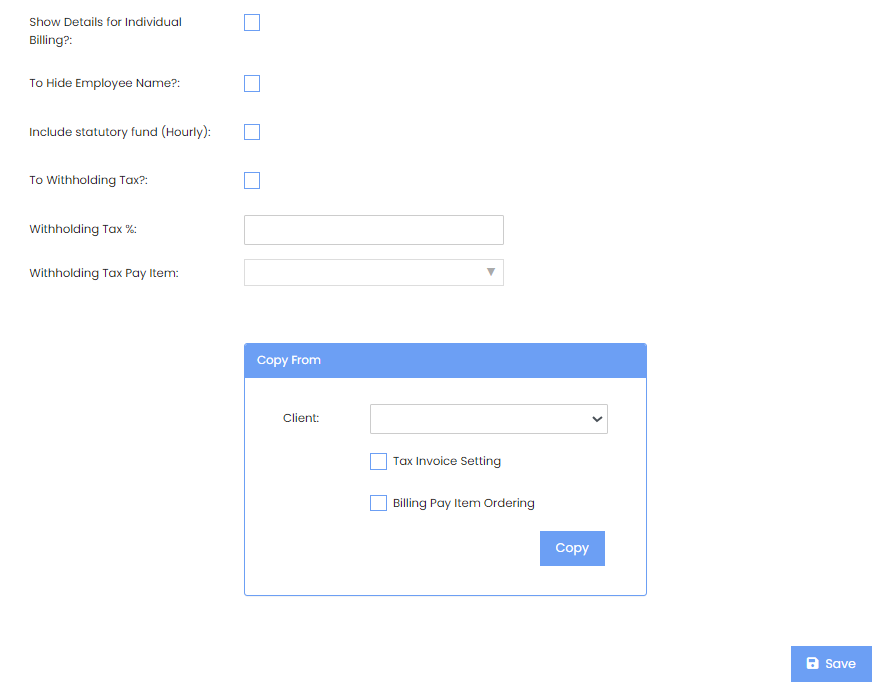 |
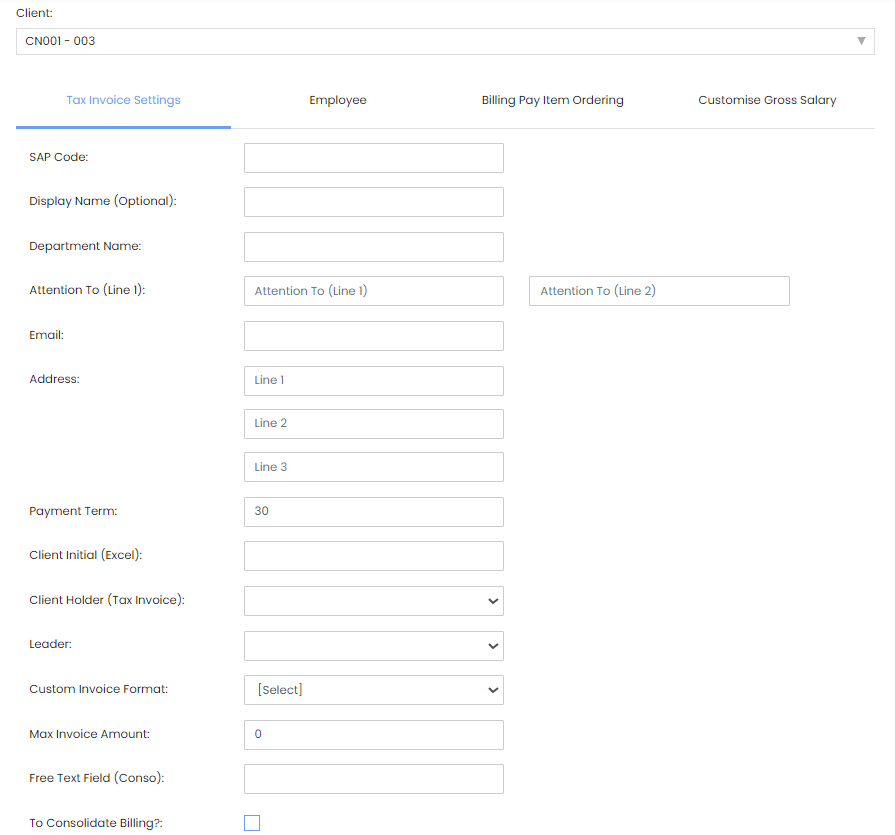
To Edit Tax Invoice Settings: Step 1: Firstly, click the Tax Invoice Settings tab at the top of the page. You will be redirected to the page as shown in Image 1, on the left. Step 2: Fill up all the required fields, as shown in Image 1, on the left. Once done, click [Save] to save the changes that you have made. Step 3: Alternatively, you may also Copy the Tax Invoice Settings by scrolling to the bottom of the page to the Copy From section. Here, select the Client, and select if you want to copy the Tax Invoice Setting, or Billing Pay Item Ordering, or both. Once done, click [Save] to save the changes that you have made. |
 |
To Edit Employee:
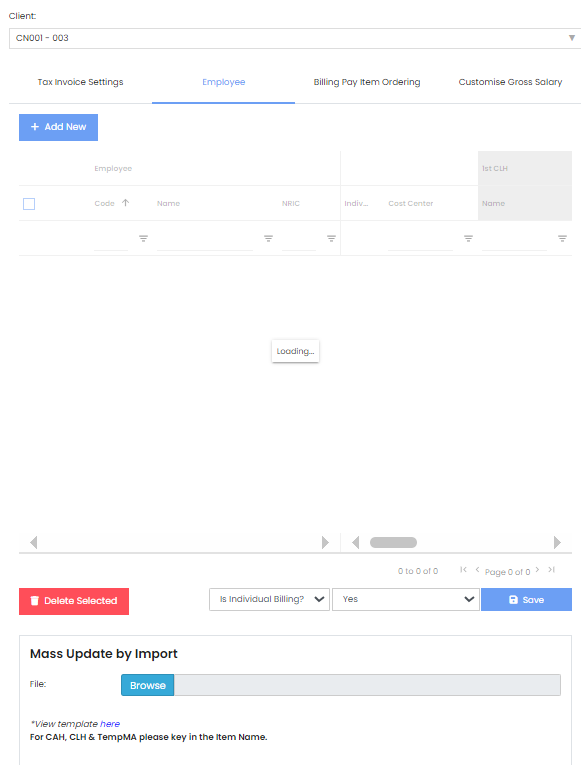
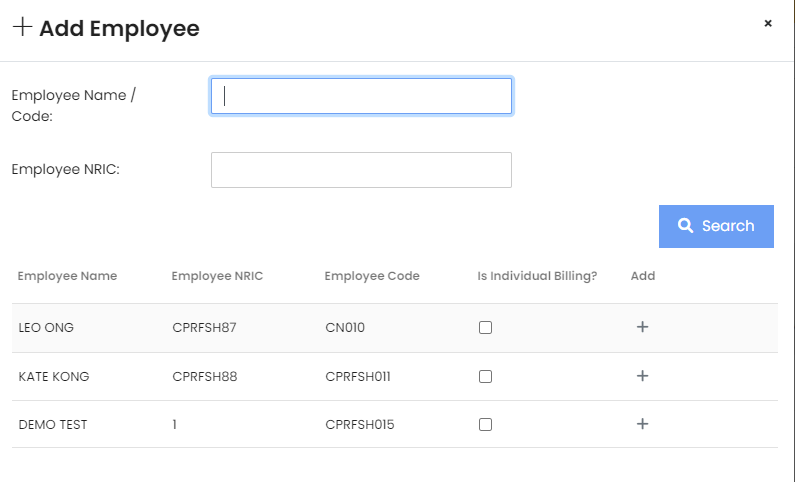
Step 1: Firstly, click the Employee tab at the top of the page. You will be redirected to the page as shown in Image 2, on the left. Step 2: To add a new employee, click [+ Add New] and the following popup will appear, as shown in the image below. Step 3: You may search for an employee by Employee Name/ Code or by Employee NRIC. Once done, click the [Search] button to display the employees that match. To add employee, click the [+] button on the row of their entry, as can be seen in the image below. Step 4: A confirmation window will appear. To confirm the addition of the employee, click [Yes, add it!]. Else, click [Cancel].
Step 5: To Mass Update by Import, scroll to the bottom of the page. Click the [Browse] button next to File: to upload files from your local computer.
|
|
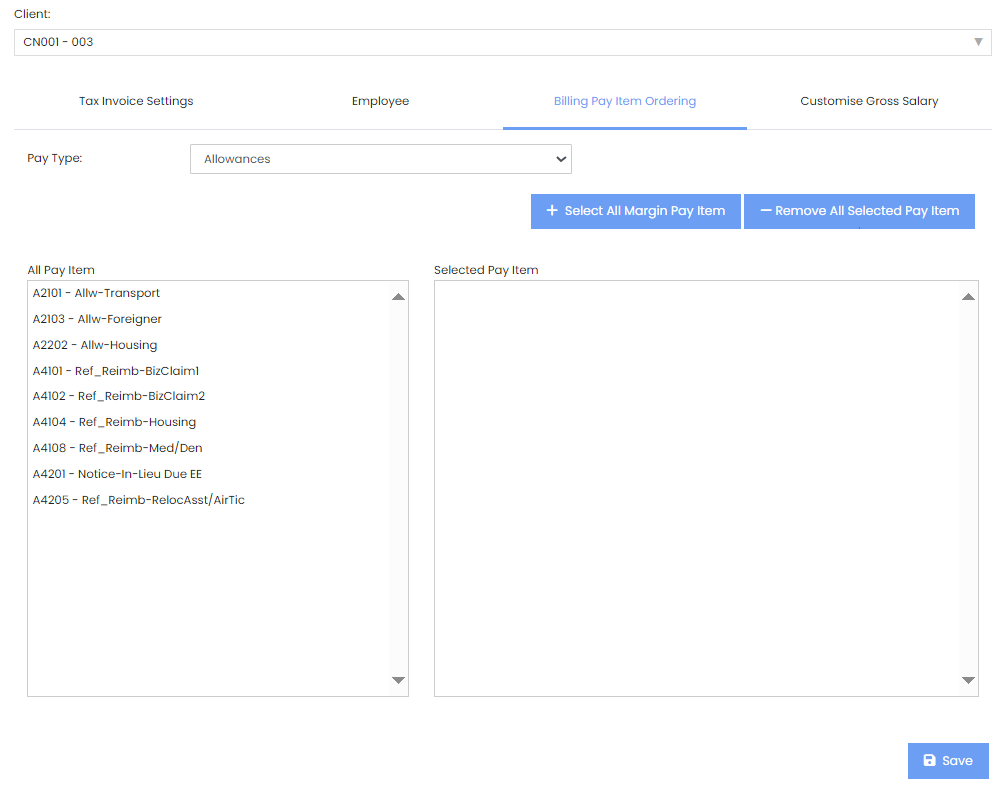
To Edit Billing Pay Item Ordering: Step 1: Step 2: |
|
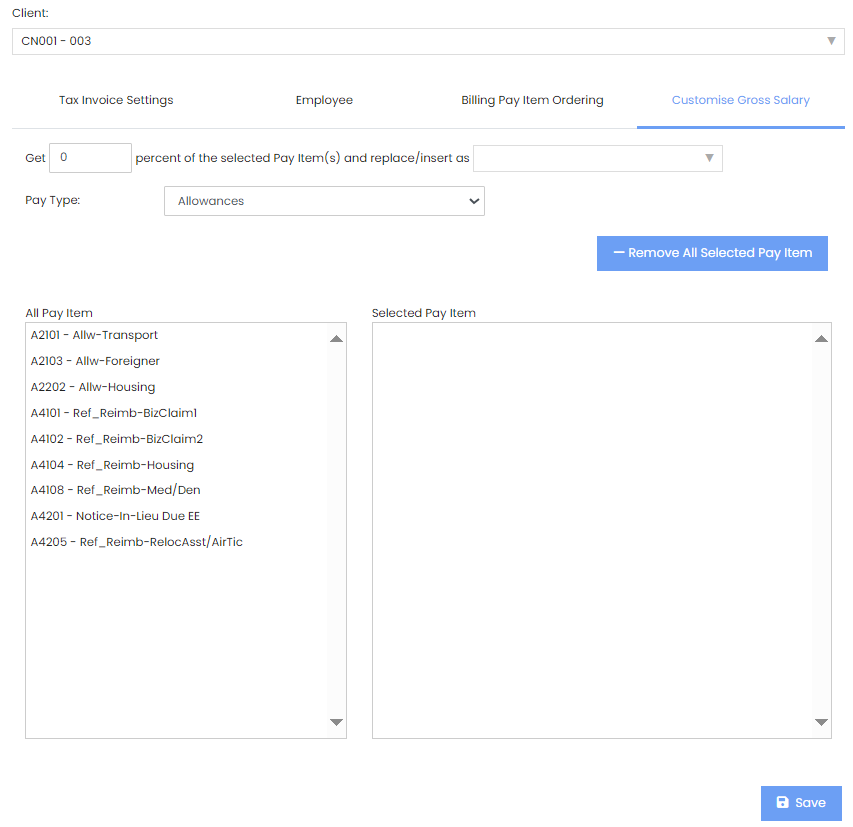
To Customize Gross Salary: Step 1: Step 2: |